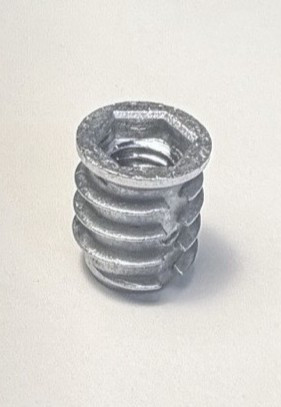
Self tapping insert with 3 holes


Self-tapping insert with 3 cutting holes – robust screw-in thread solution for HPL and composite
Why choose a self-tapping insert with 3 cutting holes?
The self-tapping insert with three cutting holes from Juno Industries is engineered to taper its own thread directly during installation — no pre-tapping required. This makes it ideal for efficient, repeatable assembly in HPL, composites and ligth alloy, and perfectly suited for both production runs and maintenance operations.
Description
Key advantages and technical benefits
High mechanical strength and long-term durability
Thanks to its special outerthread with three cutting holes, the insert provides a strong, wear-resistant internal thread that withstands heavy loads, frequent assembly/disassembly, and vibration — even in challenging or variable materials.
Easy, reliable installation
Simply drill a correctly sized pilot hole (with a slight chamfer), then screw the insert straight in. The cutting holes create the thread as you install, reducing labor time and risk of error. This quick installation process ensures consistent quality and saves production time.
Wide material compatibility
This self-tapping insert is suitable for use in HPL, composites and aluminum — making it versatile for furniture, light metals or composite assemblies.
Typical applications
-
Furniture manufacturing and interior fittings — secure joints in wood and wood–metal constructions
-
Industrial assembly and maintenance — detachable yet strong fixings for mechanical parts
-
Plastic and composite components — where traditional tapping or threading fails or is unreliable
-
Light metal fabrication — aluminum or soft metal parts where a durable internal thread is required
Why trust Juno Industries inserts?
Our self-tapping inserts are manufactured under strict European standards, ensuring tight tolerances, clean cutting edges and consistent thread quality. You get a reliable, professional-grade solution designed for demanding industrial and manufacturing environments.